90% of painting is prep work.
There are no shortcuts when it comes to achieving a long lasting finish on your home. A lot of painters will give less expensive estimates for exterior painting and put the focus on charging you for two coats and what kind of paint they are using, but the real proof is in how deep a painter is willing to dig. Anybody can put a coat of paint on something and it will look good for six months to a year, but within 18 months it’ll begin failing and this is where the cheap bid that you took in the first place ends up being way more expensive in the long run when you have to call somebody to come out and fix it. The typs of painters who do little to no prep and just slap paint on are called ‘blow and go’ painters. They are pretty easy to identify; they’re the ones who tell you what you want to hear.
There are many different types of paint and primers on the market and not all of them are suitable for your exterior, you need a primer that will breathe and flex with the house- one that allows moisture to escape, but is not affected by the elements. Breeze painting are experts in this field. Below is a basic outline of prep that is done on every exterior job we do. (Assuming all steps need to be done, ie some buildings are in better condition than others.)
1.Cleaning
A clean, sound substrate is essential for good paint adhesion. A pressure washer with the proper detergent is the most efficient means of thoroughly cleaning exterior siding. Trisodium phosphate (TSP) is a good, safe cleaning agent. To remove and prevent mildew, use a detergent with mildewcide or a mixture of one quart household bleach in three quarts of water. Rinse the surface when cleaning is completed.
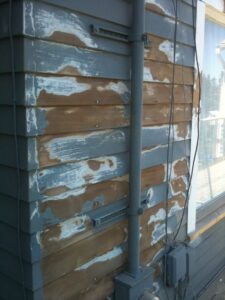
This siding has been thoroughly scraped and sanded smooth.
2.Removing Loose Paint
Scrape away loose paint. Using a carbide bit on a hand scraper, remove paint that’s flaking or located in areas that the washer didn’t reach. You can usually visually tell what paint is loose by the appearance of ‘flags’ and/or ‘checking’, which basically looks like cracked mud! (Scraping to the bare wood is not necessary if the old paint is intact. It can be painted over after sanding.)
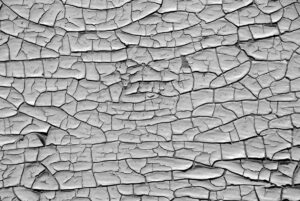
‘Checking’
3.Repair Relevant Areas
Repair any surface flaws with a surface repair compound rated for exterior use. Sand the surface when dry. (There are many types of repair scenarios that may ned to be addressed- from rotting wood to missing shakes, to crumbling concrete. We will elaborate on repairs elsewhere.)
4.Remove Old Caulk
Dig out old brittle caulk and re-caulk around door trim, windowsills and other areas that need to be sealed with a paintable exterior caulk. Caulk will help keep out damp and cold drafts.
5.Mask and Cover
Use drop cloths to protect flowerbeds and lawns. Gently tie up and cover shrubs. Mask all other surfaces not to be painted, such as windows.
6.Prime
Prime bare wood and any area where repairs have been made.
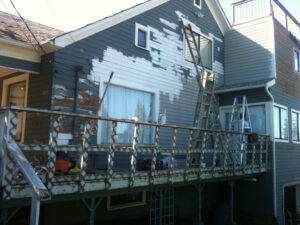
The bare wood on this house has been primed prior to painting.